

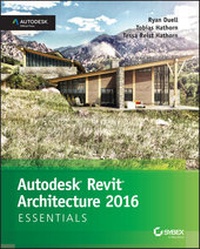
Autodesk Revit Architecture 2016 Essentials
Beschreibung

Weitere Details
Weitere Ausgaben
Andere Ausgaben
Personen
Inhalt
Introduction xix
Chapter 1 Introducing the Autodesk Revit Architecture Interface 1
Understanding the User Interface 2
Exercise 1.1: Use the Properties Palette to See Dynamic Updates of Properties 2
Exercise 1.2: Explore the Content of Your Project with the Project Browser 5
Exercise 1.3: Use the View Control Bar to See Frequently Used View Properties 6
Exercise 1.4: Navigate with the ViewCube 8
Creating a Simple Layout 10
Exercise 1.5: Create a Floor 10
Exercise 1.6: Create Walls 12
Exercise 1.7: Create Levels 13
Exercise 1.8: Change Wall Type 15
Exercise 1.9: Place Interior Walls 18
Exercise 1.10: Place Doors and Windows 20
Exercise 1.11: Space Elements Equally 22
Now You Know 26
Chapter 2 Walls and Cur tain Walls 27
Understanding Wall Types and Parameters 27
Basic Walls 28
Stacked Walls 30
Curtain Wall Types 31
Hosting Elements in Walls 32
Creating Wall Configurations 33
Exercise 2.1: Create Wall Configurations 33
Exercise 2.2: Host a Door in a Wall 35
Modifying Wall Parameters 36
Exercise 2.3: Modify Wall Parameters 36
Editing and Resetting Wall Profiles 38
Exercise 2.4: Edit and Reset the Wall Profile 39
Exercise 2.5: Attach and Detach the Top/Base 40
Cutting Openings 42
Exercise 2.6: Cut Openings in a Curved Wall 42
Splitting Walls 43
Swapping Walls 44
Creating Curtain Walls 44
Exercise 2.7: Create and Customize a Curtain Wall 45
Exercise 2.8: Modify Curtain Wall Type Properties 48
Editing Wall Profiles 51
Embedding Curtain Walls 52
Exercise 2.9: Embed and Edit Curtain Wall Profile 52
Curtain Panels 54
Adding and Removing Grids and Mullions 54
Exercise 2.10: Add and Remove Curtain Grids and Mullions 54
Exercise 2.11: Customize Curtain Panels 56
Now You Know 58
Chapter 3 Floors, Roofs, and Ceilings 59
Creating Floors 59
Exercise 3.1: Create a Floor by Sketch and Pick Walls 60
Exercise 3.2: Edit the Floor Boundary 62
Exercise 3.3: Create Sloped Floors 64
Exercise 3.4: Create an Opening with the Opening by Face Tool 68
Exercise 3.5: Create an Opening with the Shaft Opening Tool 69
Creating Roofs 72
Exercise 3.6: Create a Roof by Footprint 72
Exercise 3.7: Create a Roof by Extrusion 75
Exercise 3.8: Create Slope Arrows 79
Exercise 3.9: Create Multiple Roof Slopes 81
Adding Ceilings 84
Exercise 3.10: Add Automatic and Sketch Ceilings 85
Exercise 3.11: Create a Bulkhead 88
Exercise 3.12: Add Lights and Rotate the Grid 90
Exercise 3.13: Slope the Ceiling 92
Now You Know 93
Chapter 4 Stairs, Ramps, and Railings 95
Creating a Generic Railing 95
Exercise 4.1: Create a Generic Railing 96
Creating Stair Configurations 99
Exercise 4.2: Create a Stair by Component 100
Exercise 4.3: Create a Stair by Sketch 104
Exercise 4.4: Customize and Create a Component Stair Landing 106
Exercise 4.5: Create a Multistory Stair 109
Exercise 4.6: Modify Level and Stair Height 111
Exercise 4.7: Host a Railing to a Stair 114
Exercise 4.8: Edit Railing Top Rail and Slope 116
Designing Ramps 119
Exercise 4.9: Create a Ramp and Edit the Boundary 119
Now You Know 122
Chapter 5 Adding Families 123
Understanding the Model Hierarchy 123
Exercise 5.1: Exploring the Model Hierarchy 124
Working with System Families 127
Loading System Families 127
Exercise 5.2: Transfer Project Standards 128
Exercise 5.3: Place System Families 129
Working with Component Families 130
Exercise 5.4: Create a New Family and Load It into a Project 131
Exercise 5.5: Save Out and Reload Families from Project 134
Working with Hosted Families 136
Exercise 5.6: Work with Hosted Families 137
Exercise 5.7: Place Face-Based Families 139
Exercise 5.8: Shared Nested Families 141
Working with In-Place Component Families 144
Exercise 5.9: Modify an In-Place Family 145
Finding Content 146
Now You Know 148
Chapter 6 Modif ying Families 149
Modifying 3D Families 149
Exercise 6.1: View Scale and Detail Level 150
Exercise 6.2: Assign Visibility to Detail Levels 154
Family Categories 157
Exercise 6.3: Edit the Family Category 158
Exercise 6.4: Update a Family Origin 160
Exercise 6.5: Enable and Modify the Room Calculation Point 164
Exercise 6.6: Modify Hosted Components 167
Exercise 6.7: Incorporate Nested Families 172
Modifying 2D Families 176
Exercise 6.8: Edit a Tag Family 176
Exercise 6.9: Edit a Profile Family 178
Exercise 6.10: Update Detail Components 181
Exercise 6.11: Modify the Title Blocks 183
Family Tips and Best Practices 186
Now You Know 188
Chapter 7 Schematic Design 189
Importing a 2D Image 189
Exercise 7.1: Import and Scale a 2D Image 190
Designing with a 3D Sketch 192
Exercise 7.2: Use a 3D Sketch from FormIt 193
Exercise 7.3: Create Mass Floors 195
Exercise 7.4: Update a Mass 196
Creating Revit Elements from a Mass 197
Exercise 7.5: Create Floors from a Mass 197
Exercise 7.6: Create Walls from a Mass 198
Exercise 7.7: Create a Curtain System 200
Exercise 7.8: Create a Roof from a Mass 201
Now You Know 202
Chapter 8 Rooms and Color Fill Plans 203
Defining Rooms in Spaces 203
Room Tags 204
Room Boundaries 205
Room Separation Lines 205
Deleting Rooms 206
Exercise 8.1: Add Rooms and Room Tags 206
Exercise 8.2: Modify a Room Boundary 210
Exercise 8.3: Delete a Room Object 212
Generating Color Fill Room Plans 214
Exercise 8.4: Add and Modify a Color Scheme 214
Exercise 8.5: Add Tags and Color Fills in Section 217
Now You Know 219
Chapter 9 Materials, Visualization, Rendering 221
Materials 221
Exercise 9.1: Define a Material 222
Exercise 9.2: Assign a Material 224
Graphic Display Options 225
Exercise 9.3: Presentation Elevation View 226
Exercise 9.4: Presentation 3D View 228
Exercise 9.5: 3D Exploded View 230
Rendering 231
Exercise 9.6: Render a View 231
Exercise 9.7: Interactive Rendering 234
Exercise 9.8: Cloud Rendering 235
Now You Know 237
Chapter 10 Worksharing 239
Worksharing Options 239
Configuring Worksharing 240
Exercise 10.1: Enable Worksharing 241
Exercise 10.2: Create a Local File and Worksets 243
Exercise 10.3: Assign Elements to Worksets and Control Visibility 245
Saving to the Central Model 248
Exercise 10.4: Two-User Workflow 251
Exercise 10.5: Open and Close Worksets 253
Worksharing Display Modes 255
Editing Requests 258
Worksharing Best Practices 259
Now You Know 260
Chapter 11 Details and Annotations 261
Creating Details 261
Detail Line 262
Region 263
Component 263
Arranging Elements in the View 264
Repeating Detail Component 265
Insulation 266
Detail Groups 267
Linework 268
Exercise 11.1: Enhance a Detail with Regions 269
Exercise 11.2: Add Detail Components and Detail Lines 272
Exercise 11.3: Create a Repeating Detail Component 275
Annotating Your Details 277
Dimensions 278
Tags 278
Text 278
Exercise 11.4: Add Dimensions to Your Detail 278
Exercise 11.5: Add Tags and Text to Your Detail 283
Creating Legends 286
Exercise 11.6: Create a Legend 287
Now You Know 289
Chapter 12 Drawing Sets 291
Schedules 291
Understanding Schedules 292
Exercise 12.1: Create a Window Schedule 292
Exercise 12.2: Create a Room Schedule 296
Exercise 12.3: Create a Sheet List 299
Placing Views on Sheets 301
Exercise 12.4: Arrange Plan Views on a Sheet 301
Exercise 12.5: Adjust Crop Regions 306
Exercise 12.6: Add Schedules to Sheets 308
Printing Documents 310
Exercise 12.7: Explore the Print Dialog Box 310
Now You Know 314
Chapter 13 Workf low and Site Modeling 315
Understanding a BIM Workflow 315
Staffing a BIM Project 318
Project Roles Using Revit Architecture 318
Architect 319
Modeler 320
Drafter 320
Adding Team Members to Fight Fires 321
Modeling a Site 322
Toposurface 323
Building Pad 324
Exercise 13.1: Model a Toposurface 325
Exercise 13.2: Create a Building Pad 327
Performing Quality Control on Your Model: Keeping an Eye on File Size 328
Purging Unused Families and Groups 329
Managing Links and Images 330
Cutting Down on the Number of Views 330
Dealing with Warnings 331
Now You Know 333
Chapter 14 Repetition in Revit 335
Repeating Geometry 335
Component Families 335
Exercise 14.1: Create and Apply Family Types 336
Groups 338
Exercise 14.2: Create and Edit a Group 338
Exercise 14.3: Create Variation in Groups 341
Assemblies 343
Exercise 14.4: Create and Edit an Assembly 343
Exercise 14.5: Create Assembly Views 345
Revit Links 347
Exercise 14.6: Create Revit Links 348
Utilize Tips and Shortcuts 349
Now You Know 356
Appendix Autodesk Revit Architecture 2016 Certification 357
Index 367
Introduction
Welcome to Autodesk Revit Architecture 2016 Essentials, based on the Autodesk® Revit® Architecture 2016 software release.
We continually shape the focus and content of our book from our diverse experience as Revit teachers, writers, users, support specialists, designers, and testers. We have tailored the content to what we think is the most valuable combination of topics and generated exercise files that target these topics. Because we teach Revit Architecture to first-time users, we feel this book's content is of most value to our students learning the program for the first time. This book should benefit new Revit Architecture users as well as long-term users who may not use every aspect of the program on a daily basis and could benefit from revisiting exercises as needed.
Revit Architecture 2016 includes several new valuable tools. While each tool may not be considered "essential," we have made an effort to mix new tools, tips, and tricks, along with established features, into the context of the text and supporting exercises. For this book, many of the existing exercises have been revisited, and we've included new exercises meant to further your knowledge of Revit. The book follows real-life workflows and scenarios and is full of practical examples that explain how to leverage the tools within Revit Architecture. We hope you find that the topics in this book are beneficial and contribute to your continual Revit development.
Who Should Read This Book
This book is written for architects, designers, students, and anyone else who needs their first exposure to Revit Architecture or has had an initial introduction and wants a refresher on the program's core features and functionality. We've designed the book to follow real project workflows and processes to help make the tools easy to learn, and the chapters are full of handy tips to make it easy to leverage Revit Architecture. This book can also be used to help prepare for Autodesk's Certified User and Certified Professional exams. For more information on certification, please visit www.autodesk.com/certification.
What You Will Learn
This book is designed to help you grasp the basics of Revit Architecture using real-world examples and techniques you'll use in everyday design and documentation. We'll explain the Revit Architecture interface and help you find the tools you need as well as help you understand how the application is structured. From there we'll show you how to create and modify the primary components in a building design. We'll show you how to take a preliminary model and add layers of intelligence to help analyze and augment your designs. We'll demonstrate how to create robust and accurate documentation and then guide you through the construction process. Whenever possible, we will both teach you how to use Revit and show you how to put those newfound skills to use in focused exercises.
As you are already aware, building information modeling (BIM) involves more than just a change in software; it also represents a change in architectural workflow and culture. To take full advantage of both BIM and Revit Architecture in your office, you'll have to make some changes to how you work. We've designed the book around an ideal, integrated workflow to aid in this transition.
What You Will See
The screen captures and other graphics in this book are based on Revit 2016, which combines the architectural, structural, and MEP disciplines and tools into a single application. If you notice small differences based on the exact version of Revit you have installed, we apologize, but it would be very confusing to base the book on all versions of the application, noting all the small differences along the way. However, whichever version you have, you'll be able to follow the lessons and chapter exercises of this book with ease.
What You Need
To leverage the full capacity of this book, we highly recommend you have a copy of Revit installed on a computer strong enough to handle it. To download the trial version of Revit (offered as Revit 2016), go to www.autodesk.com/ revitarchitecture, where you'll also find complete system requirements for running the application.
From a software standpoint, the exercises in this book are designed to be lightweight and not computationally intensive. This way, you avoid long wait times to open and save files and perform certain tasks. That said, keep in mind that the Autodesk-recommended computer specs for Revit Architecture are far more than what you need to do the exercises in this book but are exactly what you need to work on a project using Revit Architecture.
Free Autodesk Software for the Education Community
The Autodesk Education Community is an online resource with more than five million members that enables the education community access to download-for free (see website for terms and conditions)-the same software used by professionals worldwide. You can also access additional tools and materials to help you design, visualize, and simulate ideas. Connect with other learners to stay current with the latest industry trends and get the most out of your designs. Get started today at www.autodesk.com/joinedu.
What Is Covered in This Book
Revit Architecture is a building information modeling (BIM) application that has emerged as the forerunner in the design industry. In this book, we'll focus on using real-world workflows and examples to guide you through learning the basics of Revit Architecture 2016-the essentials.
Autodesk Revit Architecture 2016 Essentials is organized to provide you with the knowledge needed to gain experience in many different facets of the software. The book is broken down into the following 14 chapters, which also contain numerous exercise files:
- Chapter 1, "Introducing the Autodesk Revit Architecture Interface," introduces you to the user interface and gets you acquainted with the tools and technology-the workflow-behind the software.
- Chapter 2, "Walls and Curtain Walls," helps you build on that initial knowledge by establishing some of the basic building blocks in architecture: walls.
- Chapter 3, "Floors, Roofs, and Ceilings," introduces you to the other basic building blocks: floors, roofs, and ceilings. By the end of the first three chapters you will begin to see how easy it is to create the core elements of your building.
- Chapter 4, "Stairs, Ramps, and Railings," explains the basics of stairs, ramps, and railings. These core components are versatile, and using them can be a bit tricky, so we'll guide you through the process of creating several types of stairs and railings.
- Chapter 5, "Adding Families," shows you how to add a core element to your project: families. You use families to create most of your content, and Revit Architecture by default comes with a robust supply.
- Chapter 6, "Modifying Families," shows you how to take these families and modify them or create your own, making the library of your content limitless.
- Chapter 7, "Schematic Design," introduces you to conceptual design workflows using Autodesk® FormItTM software and Autodesk® Sketchbook® Pro software to generate design sketches. Using those sketches, you can take the building design and model it in Revit Architecture.
- Chapter 8, "Rooms and Color Fill Plans," shows you how to add room elements to your spaces, assign information to them, and create colorful diagrams based on space, department, or any other variable you need.
- Chapter 9, "Materials, Visualization, Rendering," introduces you to visualization tools and techniques. You prepare presentation-quality views of your design in elevation, axonometric, and perspective views.
- Chapter 10, "Worksharing," discusses how to take your Revit Architecture file into a multiperson working environment. Worksharing allows several people within your office or project team to work on the same Revit Architecture file simultaneously.
- Chapter 11, "Details and Annotations," focuses on adding annotation to explain your designs. You'll learn how to add detail to your model in the form of dimensions, text, keynotes, and tags and how to embellish your 3D model with additional detailing.
- Chapter 12, "Drawing Sets," shows you how to take all this information and place those drawings and views onto sheets so they can be printed and distributed to your project stakeholders.
- Chapter 13, "Workflow and Site Modeling," provides the basics on how to take your office from a CAD environment to one that works with BIM. This chapter explores tools for every level of the project team-from the new staff to project managers. Understanding the process and workflow will be key to the success of your first Revit...